• Latest
  • Recipes
  • About
  • Blog
I Bake, You Bake
  • Latest
  • Recipes
  • About
  • Blog

Surf's Up!

Throwback Thursday to the surf board cookies I made just before my daughter's first trip to surf camp.

image.jpg

This was my first foray into using stencils, which I did with royal icing versus airbrushing. I'm hooked! I love the texture it gives the cookies. 

image.jpg

Can't wait to try making these again!

image.jpg
tags: decorated, orange, blue, beach, royal icing, #tbt
categories: cookies
Monday 08.15.16
Posted by Michelle
 

Tutu Cute Ballerina-inspired Birthday

I know, I know, "tutu cute" is offensively puny, but I couldn't help myself. It's late, I'm running on fumes, and frankly, I think these cookies are some of the cutest I've made to-date. 

Adelyn, the daughter of my former coworker, turned 5 today and requested a ballet-themed birthday party. I think it was kismet, because just a few days prior, I watched a tutorial video by the fabulous Mary of Emma's Sweets on piping tutu-inspired ruffles and couldn't wait to try it myself. How's that for timing?

Ballerina sugar cookie (I Bake, You Bake)

These were made using my FAVORITE SUGAR COOKIE and ROYAL ICING recipes -- no need to mess with perfection -- and styled to be sweet and delicate. I wanted a variety of visual interest for the cookie platter, which led to seven different designs. 

Ballet cookies (I Bake, You Bake)

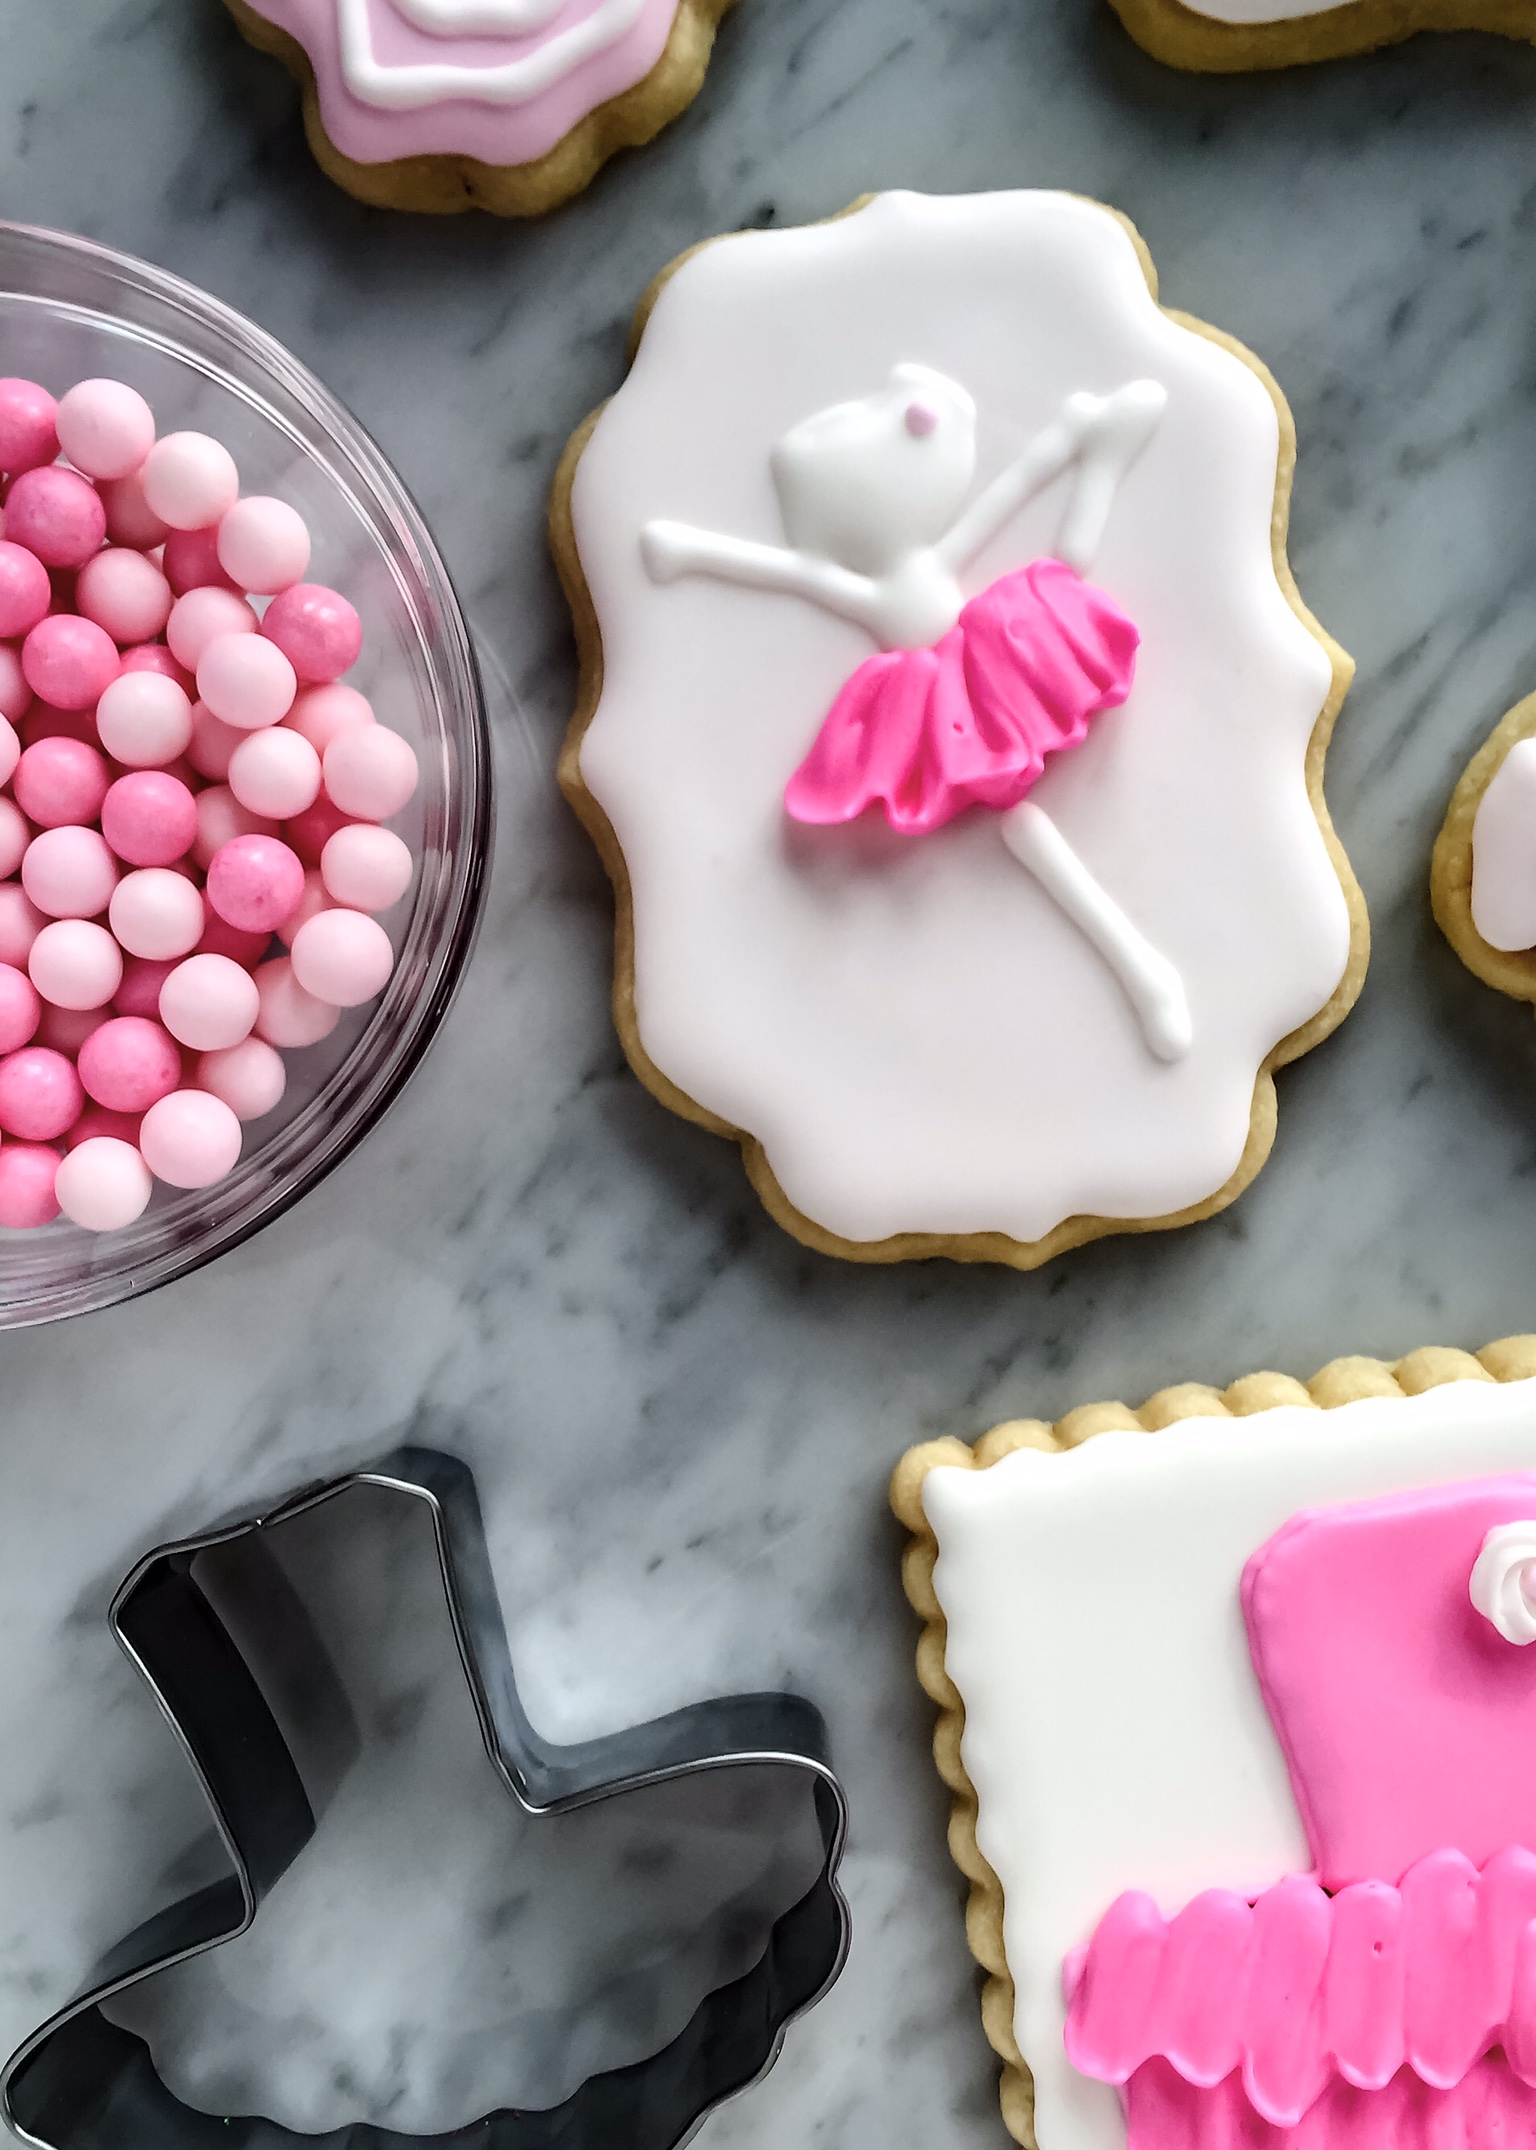
I think my favorite is this little ballerina, with her perfect dark pink tutu and little flower in her hair. I hand-piped these after seeing them on Love Bug Cookies Instagram feed. It was important to me that I represent a young ballerina as part of the cookie set, and these were just too perfect.

Little Ballerina Detail Cookie (I Bake, You Bake)

Here's a closer view of the name plate and hand-drawn ballet slippers; these were the accent cookies -- I did three of each of type. I love the long strings on the ballet slippers, and yes, I just can't seem to stay away from piping little roses on at least a few of my cookies. 

Ballet cookies (I Bake, You Bake)

Other notes:

  • As always, Amazon is my go-to resource for cookie cutters, and I got both the tutu and ballet slipper cutters from the site.
  • The ballet slippers and little ballerina were piped on the Maryann Plaque cookie cutter from Whisked Away Cutters
  • The little rose accent cookies are inspired by the now infamous whimsical roses by The Sweet Adventures of Sugarbelle. The cookie cutter is available in two sizes from Whisked Away Cutters. 
  • I used Americolor's Soft Gel Paste Food Color in shades Soft Pink and Dark Pink for all five shades of pink, as well as Peach for a soft flesh tone on the ballet slipper.
tags: ballet, birthday, sugar cookies, royal icing, custom cookies, pink
categories: cookies
Sunday 12.06.15
Posted by Michelle
Comments: 1
 

You're a Wizard, Harry...

Harry Potter is, hands down, my favorite novel series of all time. I love everything about J.K Rowling's stories -- the magic, the lessons, the Englishness -- it's all pretty much perfection in my eyes. Which is why I was so excited to learn that a favorite coworker of mine is also a Potterhead...because a fellow Potterhead means an excuse to make the Harry Potter cookies I've had in my head for ages. 

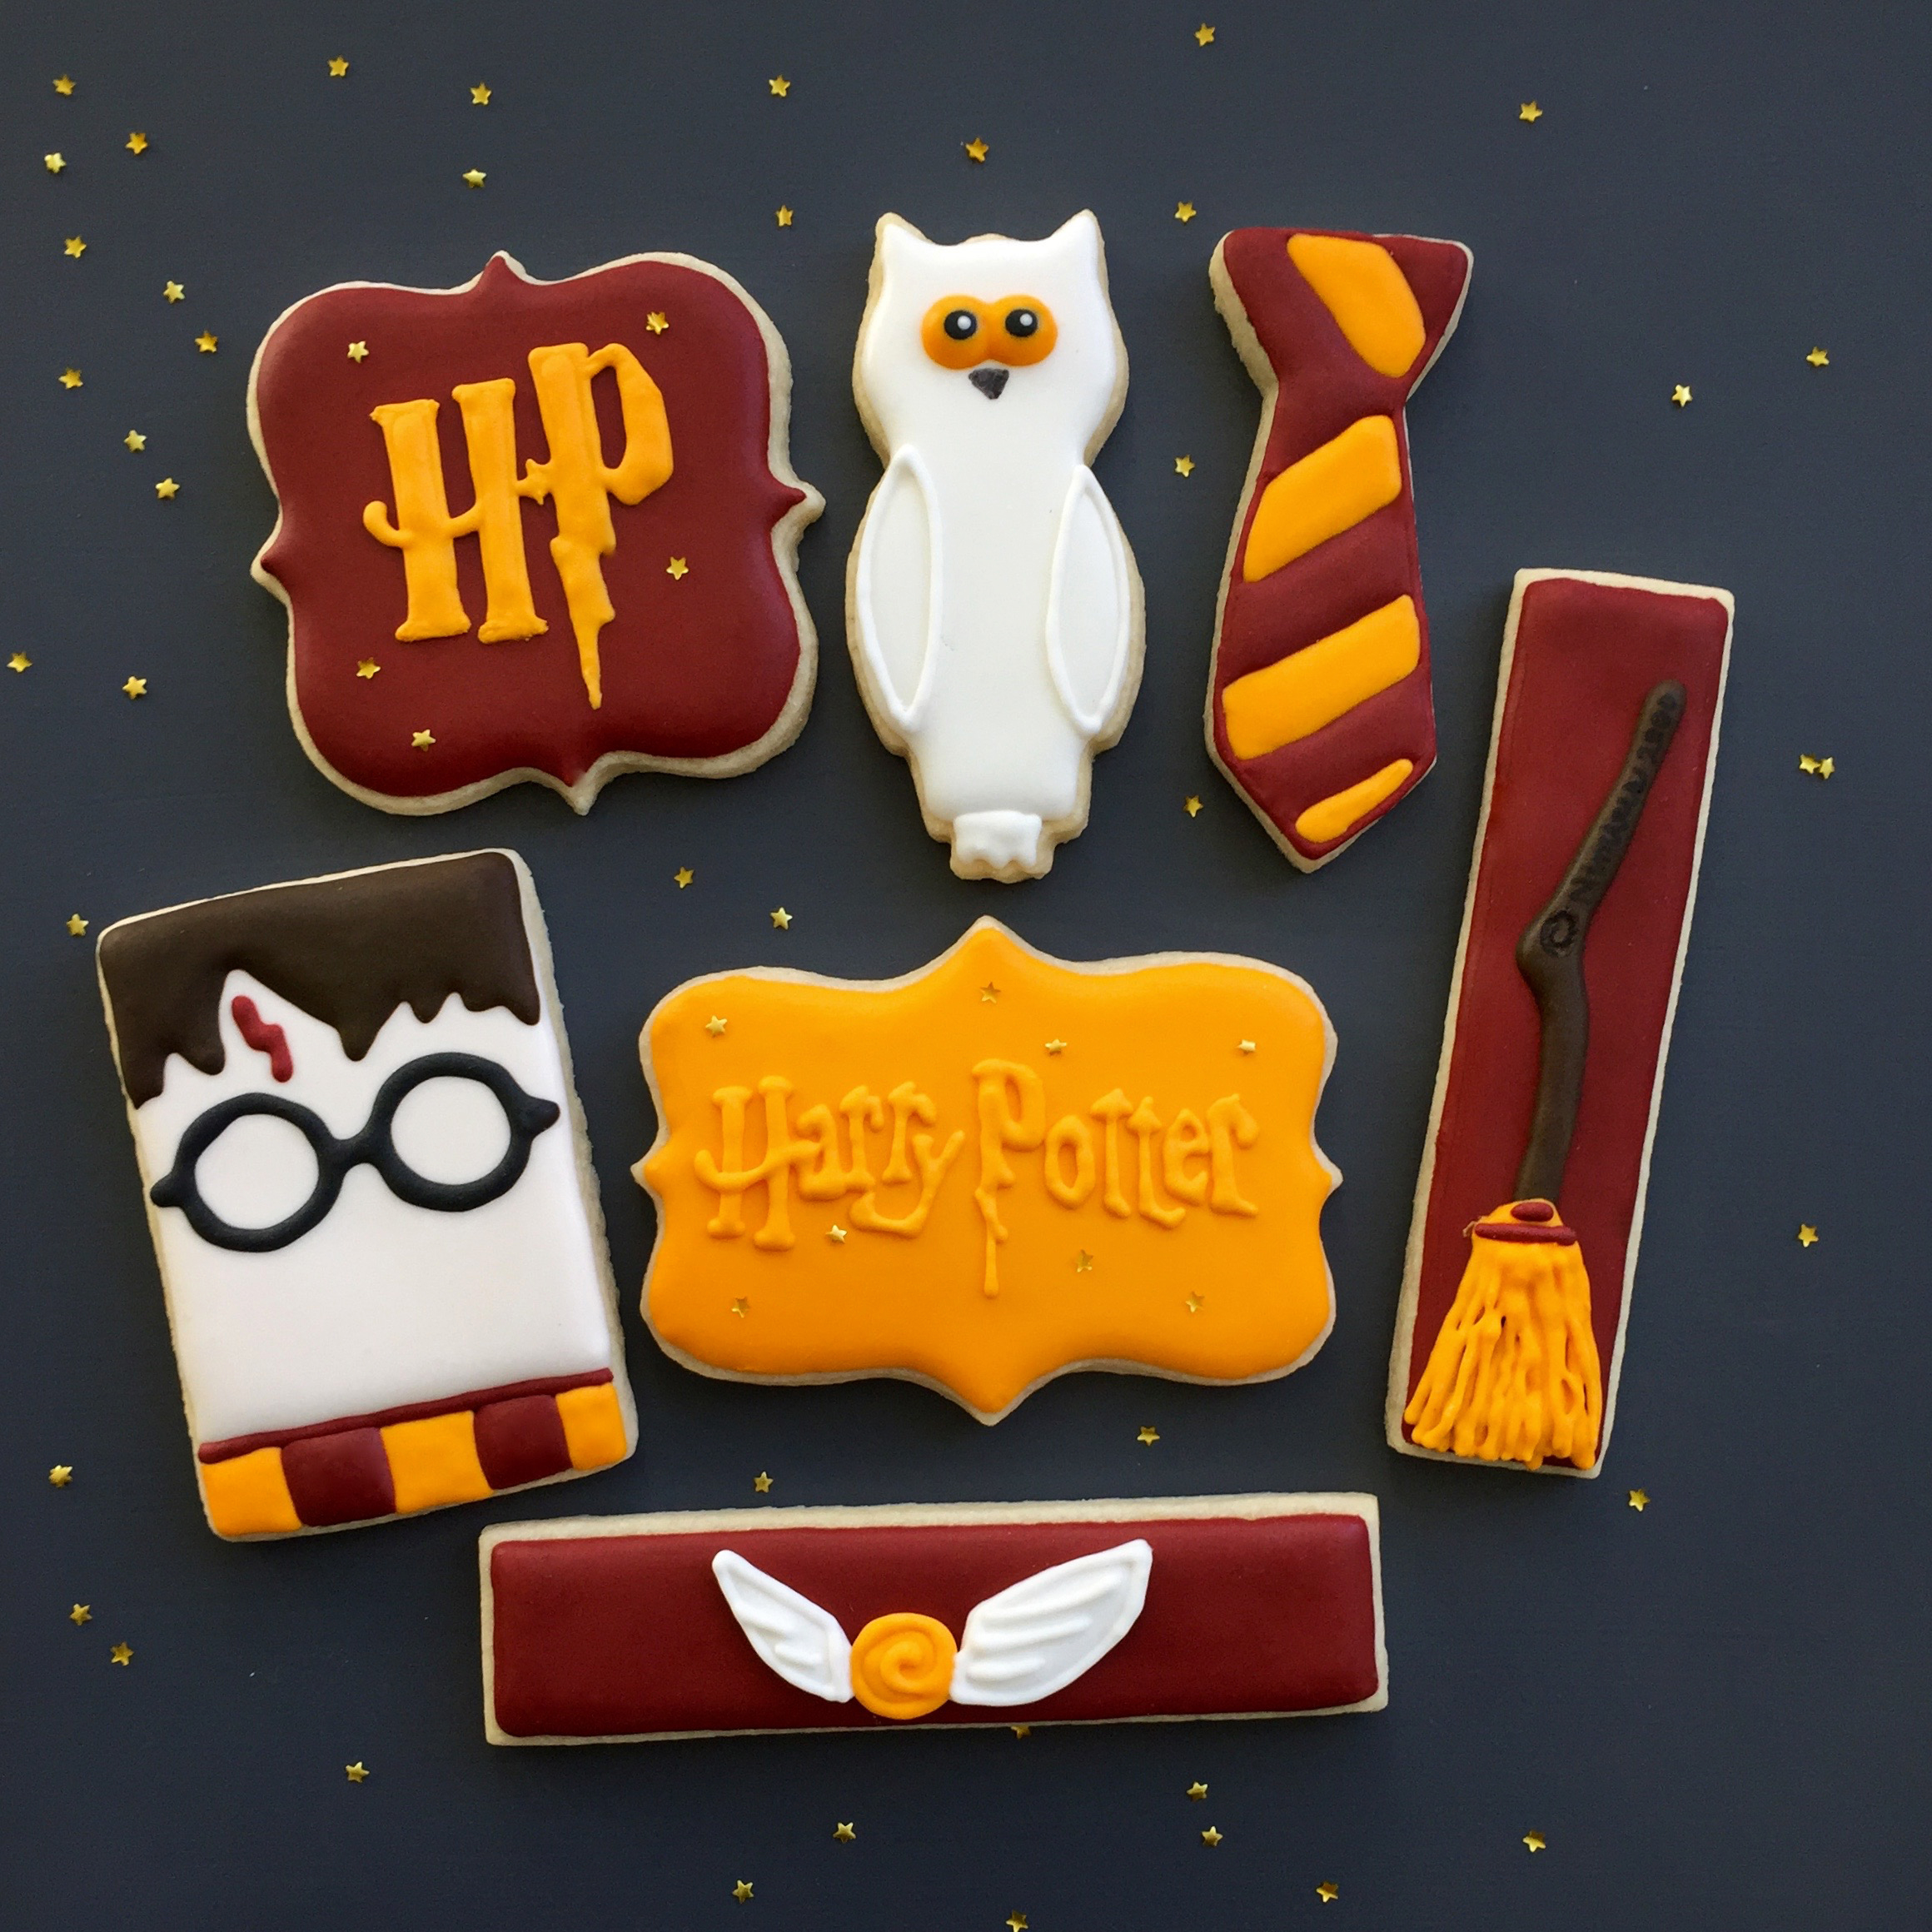
Harry, Hedwig, and Golden Snitch

Harry, Hedwig, and Golden Snitch

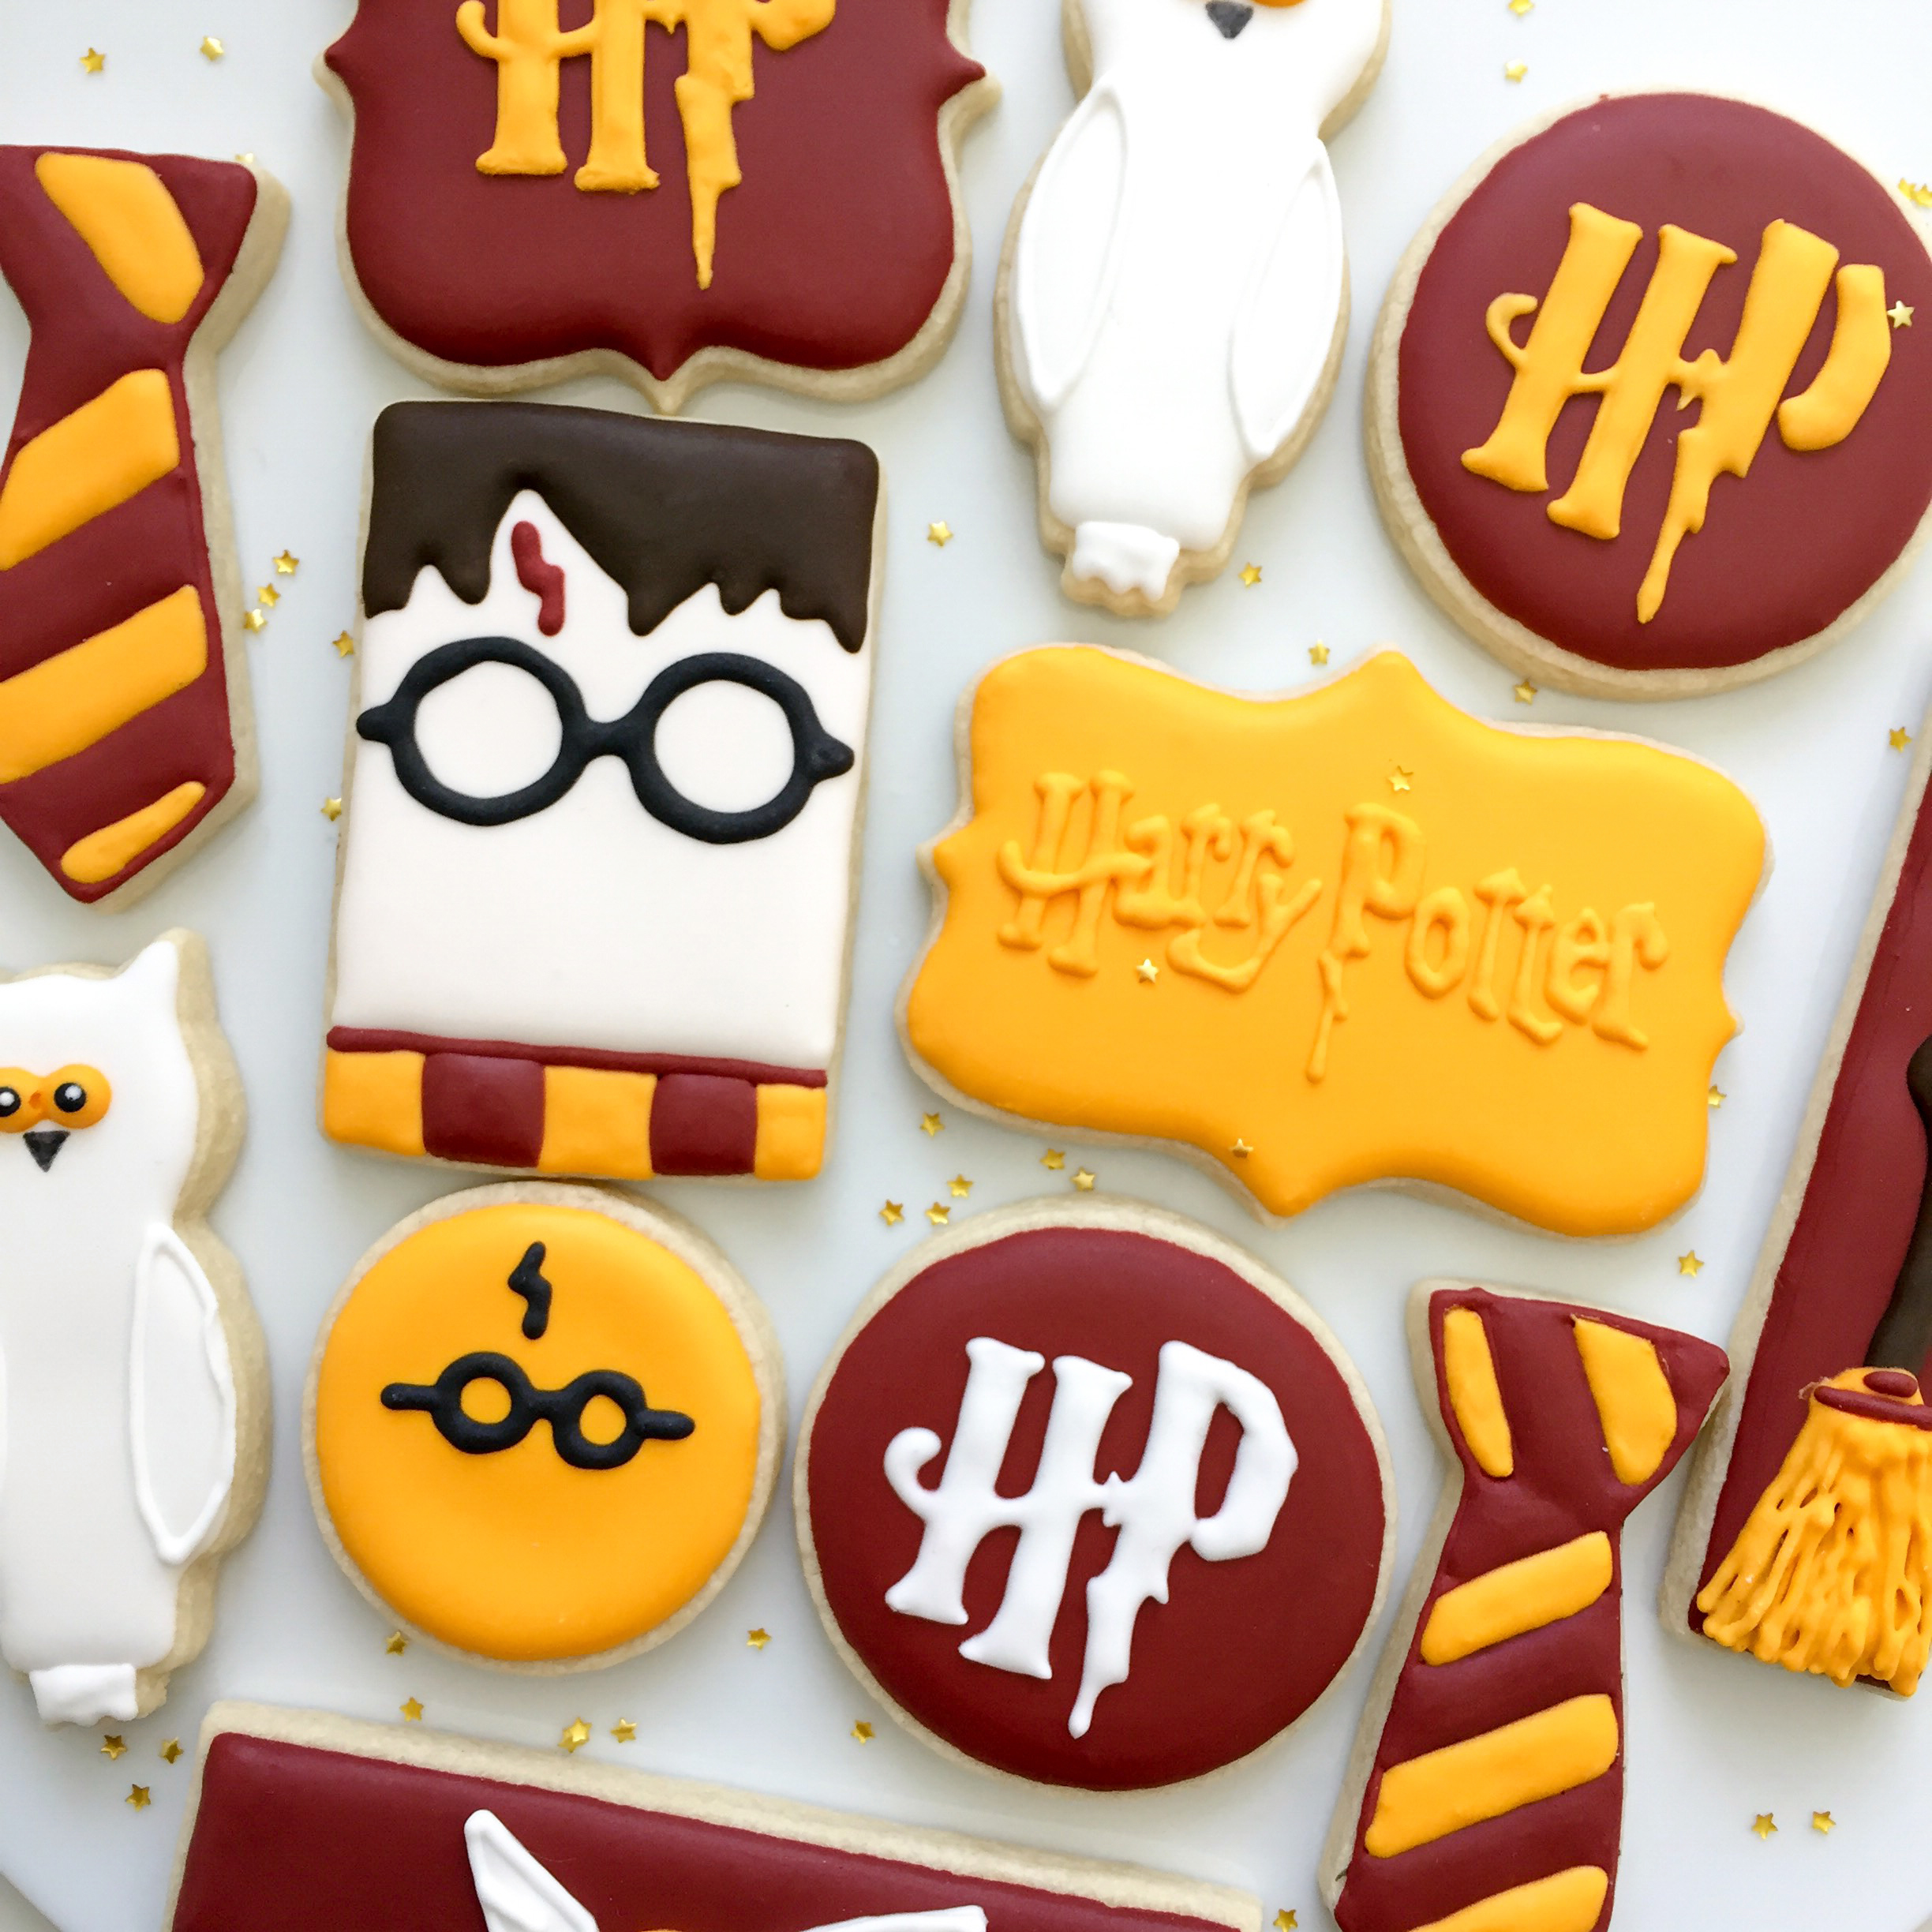
These were made using my FAVORITE SUGAR COOKIE and ROYAL ICING recipes. The cookie cutters are easy -- most, other than Hedwig and the ties -- were simple shapes onto which I piped the Harry Potter logos and shapes, including a Golden Snitch and the Nimbus 2000. 

Harry_Potter_IBakeYouBake2

I love the little gold edible stars from Wilton. These are just sprinkled on for the photos, but next time I'll definitely try to use them on the cookies themselves for a more...ahem..."magical" look. 

Harry_Potter_IBakeYouBake3

The color of these cookies was really important, as I wanted to represent the Gryffindor House colors as closely as possible. The crimson was the most difficult to replicate, but after a few attempts, I finally settled on roughly 20 drops of Wilton's Color Right crimson (not red!), with one drop black. The gold was created using 6 drops of yellow and 2 drops of orange. 

Harry_Potter_IBakeYouBake5
Logos, logos, logos everywhere

Logos, logos, logos everywhere

Other notes:

  • I got the owl and necktie cookie cutters from Cheap Cookie Cutters. If you ever need a cookie cutter, I guarantee you can find it on their site -- the selection is amazing. 
  • Hell yes, I used a Kopykake on these bad boys. Best money I've ever spent.
tags: sugar cookies, royal icing, harry potter, themed
categories: cookies
Wednesday 10.21.15
Posted by Michelle
Comments: 1
 

1960s-themed Cookies

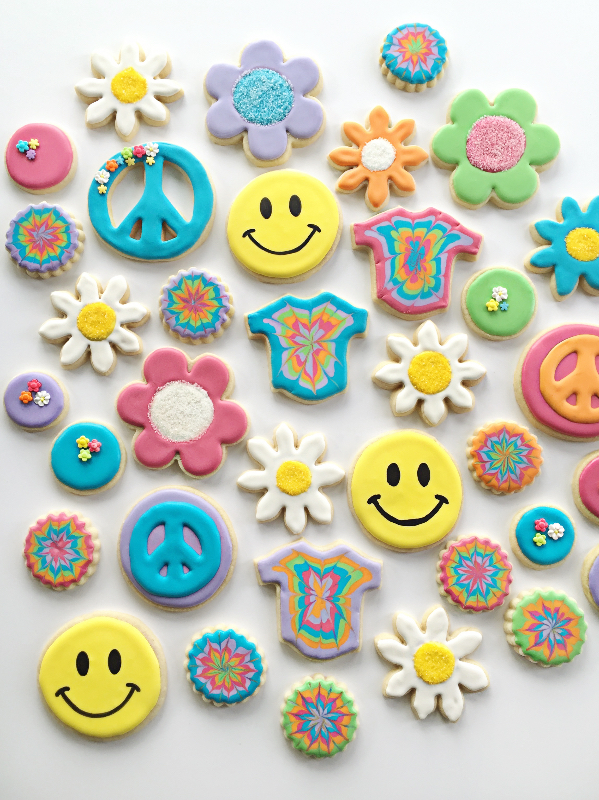
When I think of the 1960s, I think of happy faces, peace symbols, daisies, and tie dye -- all of which I created in cookie form to celebrate two special 60th birthdays. 

These are made using my FAVORITE SUGAR COOKIE and ROYAL ICING recipes. The colors were inspired by Wilton's "Peace Flower" mini baking cup set, which I used on the matching cupcakes. 

I really love the way these cookies turned out, but I have to say, making them was a nightmare. Definitely my fault for getting ahead of myself and deciding to try new decorating techniques when I really didn't have time to do so. I guess I've been really fortunate up to this point, because I've never had anything go so completely wrong before. That's what I get for being smug. 

As you can see from the picture below, the cookies on top are tie dye perfection. The cookies underneath these are my Pinterest fails. I tried a new decorating method called "dry brushing"; instead of awesome tie dye effects, I got loathsome tie dye effects with a side of pitting and dull finish. 

The problem was, these looked great while I was decorating. I completed about 30 of them and, exhausted, decided to go to bed and finish the rest in the morning. I woke up to this and had to start all over again. The good news is, I think the new versions turned out even better.

IMG_0843_GP.jpg
IMG_0815_GP.jpg

The lesson here? Definitely try new things...just don't try them 48 hours before you have to deliver four dozen cookies and cupcakes for a joint birthday party. 

Other notes:

  • I got the Peace and Happiness Stencils and Flower Icing Decorations from Copper Gifts. The Peace Symbol Cookie Cutter is from Cheap Cookie Cutters.
  • The happy faces were created using the Happiness Stencil listed above and a combination of Wilton and Americolor edible markers. I used the Wilton first to trace the eyes and mouth and the Americolor to fill them in for a nice, deep black color. 
  • The sanding sugar daisy centers were applied using a dry application. Read more about this on my YOU ARE MY SUNSHINE COOKIES blog post. 
tags: sugar cookies, birthday, royal icing, celebration, 1960s, themed
categories: cookies
Sunday 06.21.15
Posted by Michelle
 

You Are My Sunshine Cookies

The song, "You Are My Sunshine" holds a special place in my heart, as it's one I started singing to my daughter when she was in the NICU. Today, five years later, she's singing it to her baby dolls (and to me every now and then). So when my coworker asked if I'd be interested in making some sunshine-inspired treats for his daughter's second birthday, I had to say yes. 

These are made using my tried and true FAVORITE SUGAR COOKIE and ROYAL ICING recipes. But let's be honest -- these cookies are all about the styling. 

And by styling, I mean pretty pink, orange, and clear course sugar crystals with matching heart-shaped sprinkle bows and royal icing "cheeks". Because black icing and little kids never mixes well, I decided to draw the sunshine faces on using an Americolor edible marker.

I also played around with the photo "styling" a bit. I am not a professional photographer and even if I were, I think trying to capture fun, high-quality images of flat cookies would be difficult. There are only so many ways one can stack cookies to make them look interesting and still highlight the decorating. Let's just call this a continual work in progress...

View fullsize FullSizeRender_GF.jpg
View fullsize IMG_0536_GF.JPG
View fullsize IMG_0664_GF.JPG

Other notes:

  • I got the Sun Cookie Cutter from Copper Gifts. If I could buy all my cookie cutters from this amazing company, I would. All of their cookie cutters are handmade and are incredibly durable. 
  • The course sanding sugar crystals are from a Cake Boss three-pack I found at Michael's
  • I always try to apply sanding sugar or sugar crystals (let's just call these sprinkles for the sake of simplicity) after the royal icing has dried overnight. Yes, it means you need to devote more time to decorating the cookies, so it doesn't always work out in terms of timing, but the results are so worth it. If you've never tried the dry application method, do it! All you need is 1/4 teaspoon meringue powder mixed with 1/4 teaspoon warm water and a  small paint brush. Just "paint" the mixture onto the cookie where you want the sprinkles to stick, apply the sprinkles (I like to pour some in my hand for a little extra control), and tip the cookie over to remove the excess. Voila! Perfectly applied sprinkles without denting your royal icing or worrying about rogue sprinkles.
tags: birthday, royal icing, celebration, sugar cookies, decorated
categories: cookies
Tuesday 06.02.15
Posted by Michelle
Comments: 1
 
Newer / Older

Copyright © 2019 I Bake, You Bake